Patriotic Jello Cups (Non-Alcoholic Jello Shots for Kids)
Looking for a colorful dessert that will make your Fourth of July celebration extra special? These Patriotic Jello Cups are a fun, refreshing treat featuring beautiful red, white, and blue layers. They’re made with fruity gelatin, a creamy sweetened condensed milk center, and festive toppings that bring the whole dessert together.
Unlike traditional Jello shots, this family-friendly version contains no alcohol, making it a playful addition to Independence Day parties, summer cookouts, backyard celebrations, and holiday potlucks.
The best part is that you can prepare these little desserts ahead of time. Let them chill in the refrigerator, add the whipped cream and sprinkles before serving, and you’ll have a festive treat ready for your guests.
Why You’ll Love These Jell-O Cups
There are plenty of reasons to add these colorful Jello cups to your holiday dessert table:
- Completely alcohol-free: These are regular gelatin desserts designed for family gatherings and kid-friendly celebrations.
- Beautiful holiday colors: The red, white, and blue layers create an eye-catching presentation without complicated decorating.
- Easy to prepare: You only need a few ingredients and some patience while the layers chill.
- Perfect for making ahead: Prepare the cups a day before your event to save time on party day.
- Easy individual servings: Small clear cups make these desserts convenient to arrange, serve, and enjoy.
- Customizable: Change the gelatin flavors, toppings, or serving containers to suit different occasions.
Whether you’re hosting a Fourth of July barbecue or attending a summer potluck, these layered treats are sure to add something special to the celebration.
How to Make Patriotic Jello Cups (aka Non-Alcoholic Jello Shots)
Making these red, white, and blue Jello cups involves preparing three separate gelatin mixtures and allowing each one to set before adding the next.
The blue gelatin forms the bottom, followed by a creamy white center and a bright red top. A little whipped cream and patriotic sprinkles complete the festive look.
Plan ahead because every layer needs time to firm up in the refrigerator. Although the process is simple, rushing the chilling stages can cause the colors to mix together.
Ingredients for Red, White, and Blue Jell-O Cups
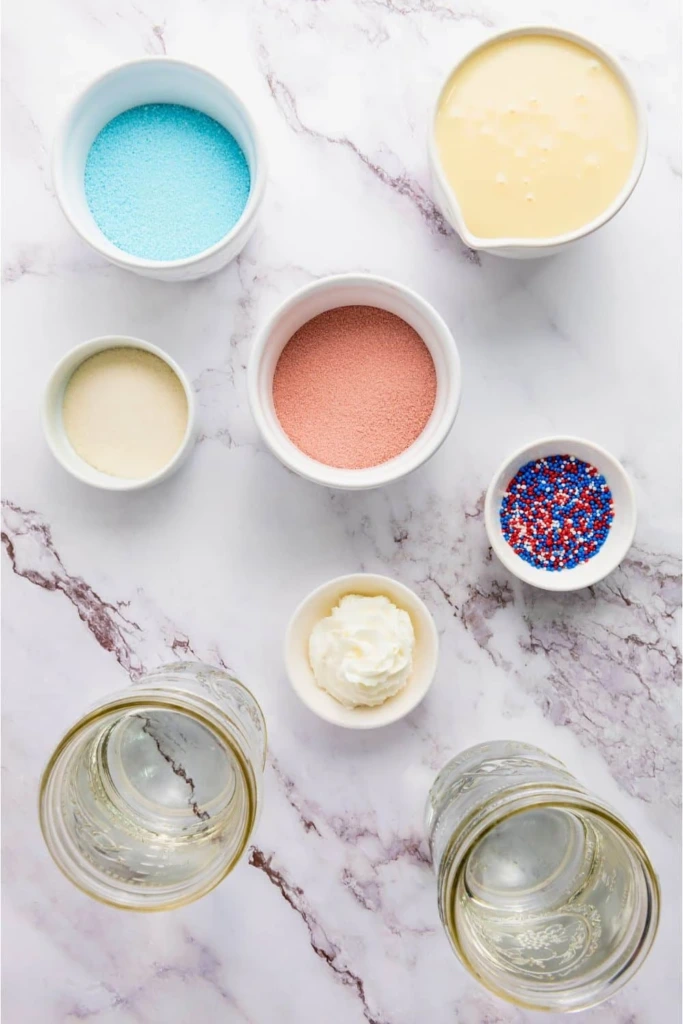
You’ll need the following ingredients to prepare these festive layered gelatin desserts.
For the blue layer:
- 1 box (3 oz) blue gelatin dessert mix, such as berry blue Jell-O
- 1 cup boiling water
- 1 cup cold water
For the white layer:
- 2 packets unflavored gelatin
- ½ cup cold water
- 1 cup boiling water
- 1 can (14 oz) sweetened condensed milk
For the red layer:
- 1 box (3 oz) red gelatin dessert mix, such as strawberry or cherry
- 1 cup boiling water
- 1 cup cold water
For the garnish:
- Whipped cream
- Red, white, and blue sprinkles
The flavored gelatin provides the bright colors and fruity taste, while the unflavored gelatin helps the creamy middle layer hold its shape. Sweetened condensed milk gives the white portion a smooth, rich texture.
Supplies You’ll Need to Make Patriotic Jello Shots
Gather your equipment before preparing the gelatin mixtures. Having everything ready makes assembling the layers much easier.
- Small clear plastic cups: Approximately 1-ounce cups work well for individual party portions. The recipe makes roughly 40 to 50 small servings, depending on how much you pour into each cup.
- Baking sheet or flat tray: Provides a stable surface for transporting multiple cups to and from the refrigerator.
- Measuring cups: Help you measure the water and other ingredients accurately.
- Whisk: Useful for dissolving the gelatin and combining the creamy mixture.
- Small ladle or squeeze bottle: Optional, but helpful when filling the cups without spilling or disturbing the previous layer.
- Mixing bowls: Use separate heat-safe bowls for the different gelatin mixtures.
Clear containers are particularly useful because guests can see all three colorful layers before taking a bite.
Step by Step instructions
Follow these four stages to assemble your patriotic gelatin cups. Make sure each layer has enough time to set before moving on to the next.
1. Blue Layer
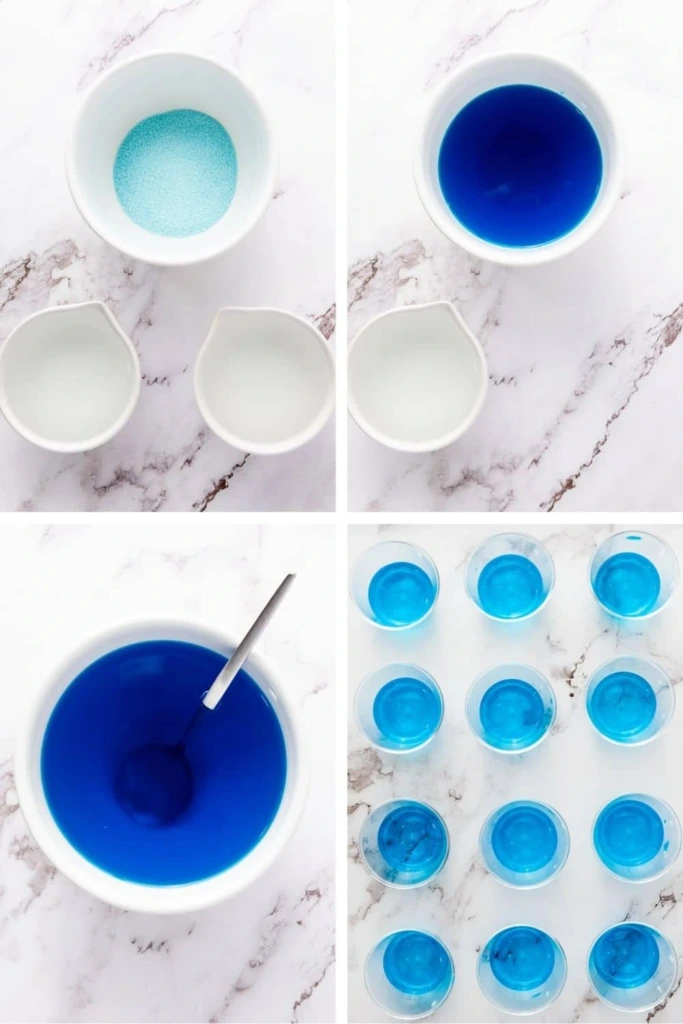
Start by preparing the bottom layer of your dessert cups.
- Empty the blue gelatin powder into a heat-safe mixing bowl.
- Pour in 1 cup of boiling water.
- Whisk until all the gelatin granules have completely dissolved.
- Add 1 cup of cold water and stir until combined.
- Arrange the small cups on a flat baking tray.
- Carefully distribute the blue mixture among the cups, filling approximately one-third of each container.
- Transfer the tray to the refrigerator and chill for about 2 to 3 hours, or until the gelatin is firm.
Check that the blue layer is completely set before preparing the next one. This creates a stable foundation for the creamy middle portion.
2. White Layer

The middle layer gives these patriotic Jello cups their creamy appearance and balances the fruity flavors of the colored gelatin.
- Place ½ cup of cold water in a mixing bowl.
- Sprinkle the two packets of unflavored gelatin evenly over the water.
- Leave the mixture undisturbed for approximately 5 minutes so the gelatin can absorb the liquid and bloom.
- Add 1 cup of boiling water and stir until the gelatin dissolves completely.
- Pour in the sweetened condensed milk.
- Whisk until the mixture becomes smooth and evenly blended.
- Allow it to cool to room temperature before using it.
- Once the blue layer has firmed up, gently pour the white mixture over it, filling approximately another third of each cup.
- Return the cups to the refrigerator and chill for another 2 to 3 hours.
Cooling the white mixture is important. Adding it while it’s still hot can soften the blue gelatin and cause the layers to blend.
3. Red Layer
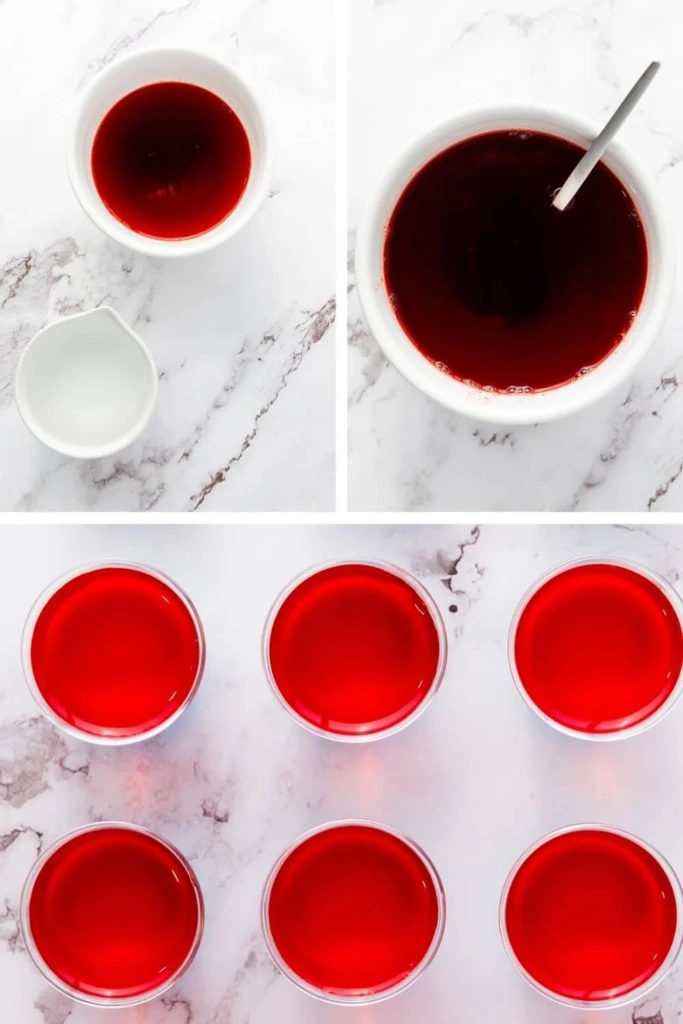
The final gelatin layer adds a vibrant red finish and completes the patriotic color combination.
- Empty the red gelatin powder into a clean heat-safe bowl.
- Add 1 cup of boiling water.
- Stir thoroughly until the powder has dissolved.
- Mix in 1 cup of cold water.
- Allow the mixture to cool slightly if necessary.
- Check that the white layer is completely firm.
- Slowly pour the red gelatin over the white layer until the cups are filled.
- Place the tray back in the refrigerator.
Let the cups chill for at least 2 hours, or preferably overnight, until the red layer has completely set.
When finished, each cup should have three distinct bands of blue, creamy white, and red.
4. Garnish
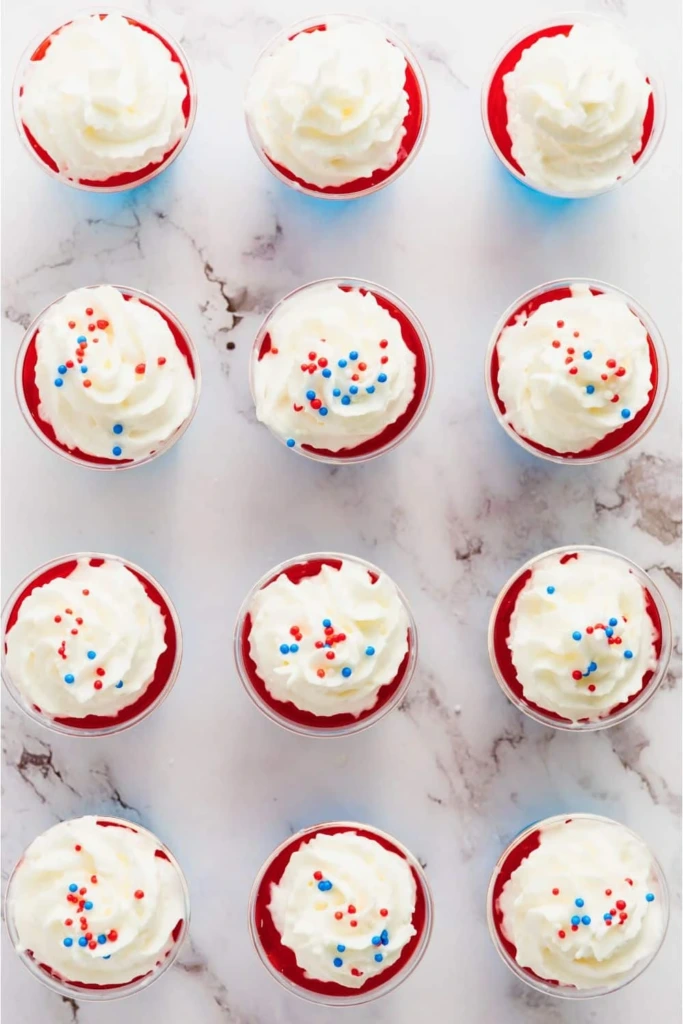
Save the finishing touches until shortly before serving so the decorations look fresh and attractive.
- Remove the chilled Jello cups from the refrigerator.
- Add a small swirl or dollop of whipped cream to each serving.
- Sprinkle red, white, and blue decorations over the top.
- Arrange the cups on a serving tray or dessert table.
You can also add a few star-shaped sprinkles for an extra festive appearance.
Keep the finished cups refrigerated until serving time, especially because of the whipped cream topping.
Tips for the Best Layered Jell-O Shots
A few simple techniques can make a big difference in how your finished Jello cups look and taste.
- Allow enough chilling time: Each gelatin layer needs to become firm before another one is added. Otherwise, the colors may run together.
- Cool mixtures before layering: The white gelatin mixture should reach room temperature before being poured over the blue layer. Avoid pouring very hot mixtures onto an already-set layer.
- Use clear cups: Transparent containers make the colorful layers visible and give the dessert a more attractive presentation.
- Pour slowly: Use a small ladle, squeeze bottle, or spoon to control the amount of gelatin going into each cup.
- Keep the cups level: Place all containers on a flat baking sheet before filling and refrigerating them. This helps create even layers.
- Avoid unnecessary movement: Once the cups are in the refrigerator, leave them undisturbed while the gelatin sets.
- Prepare ahead: Making the cups the evening before your celebration gives every layer plenty of time to firm up.
- Add toppings at the last minute: Whipped cream can lose its shape over time, so decorate the cups shortly before serving.
For food safety, keep the prepared cups refrigerated at 40°F (4°C) or below. Don’t leave them sitting out at a warm outdoor party for extended periods.
Easy Variations on Patriotic Jell-O Cups
One of the nicest things about layered gelatin desserts is how easily you can change them. You don’t have to stick with the original flavors or serving style.
Here are some fun alternatives to try:
Make a Patriotic Jello Trifle: Instead of preparing individual portions, arrange the red, white, and blue layers in one large transparent serving bowl. Guests can scoop out their own portions with a spoon.
Use Larger Dessert Cups: If you prefer bigger servings, switch to 2-ounce containers. You may need additional cups or more ingredients depending on how many guests you’re serving.
Experiment with Different Flavors: Replace strawberry or cherry gelatin with raspberry for a slightly different fruity taste. You can also try different blue gelatin flavors while keeping the same color scheme.
Try a Coconut-Inspired White Layer: For a tropical variation, experiment with a coconut milk-based gelatin layer. Use a tested gelatin ratio rather than simply substituting coconut milk for condensed milk, as the consistency and sweetness will change.
Add Fresh Fruit: Small pieces of strawberries or blueberries can provide additional texture. Make sure the fruit is cut into suitable small pieces and distributed evenly.
Create Other Holiday Colors: This layering technique works for many celebrations. Use green and red for Christmas, orange and black for Halloween, or pastel shades for Easter.
With a few ingredient changes, you can turn the same basic dessert into something appropriate for almost any festive occasion.
What to Serve with Patriotic Jell-O Shots
These colorful Jello cups make a lovely addition to a Fourth of July dessert spread. Their fruity flavor and creamy center pair nicely with other sweet and savory party foods.
If you’re planning a complete red, white, and blue celebration, consider serving them alongside:
- Firecracker Pretzel Rods: Crunchy pretzel sticks coated in sweet candy melts and decorated with colorful sprinkles. They’re easy to arrange on a party platter.
- Independence Rice Krispie Treats: Soft, chewy cereal treats decorated with patriotic colors. Their crispy texture makes a nice contrast to the smooth gelatin cups.
- Patriotic Popcorn: A fun combination of popcorn and festive decorations that guests can enjoy throughout the celebration.
- Red, White & Blue Chocolate Bark: A simple chocolate dessert decorated with colorful candies and sprinkles. Break it into small pieces for easy sharing.
You can also add fresh strawberries, blueberries, watermelon slices, sugar cookies, or vanilla cupcakes to create a varied holiday dessert table.
For a backyard barbecue, pair the sweet treats with grilled favorites, sandwiches, fresh salads, and refreshing lemonade.
Try These Patriotic Jell-O Shots for Kids
These Patriotic Jello Cups are a simple way to bring a little extra color and excitement to your Fourth of July celebration. With fruity red and blue gelatin, a creamy white center, and festive toppings, they look impressive without requiring complicated baking or decorating skills.
Because they’re completely alcohol-free, they’re a fun gelatin dessert option for family gatherings and summer parties. You can prepare them ahead, refrigerate them overnight, and finish each cup with whipped cream and sprinkles just before serving.
Whether you’re organizing an Independence Day barbecue, preparing treats for a neighborhood party, or putting together a festive dessert table, these red, white, and blue cups are worth adding to your celebration.
Make a batch, keep them chilled, and enjoy a colorful holiday dessert that everyone can admire!