DIY Punch Out Advent Calendar
Make the countdown to Christmas extra exciting with a DIY punch out Advent calendar! This fun Christmas craft turns the traditional daily treat into an interactive surprise that kids will look forward to every morning.

Instead of opening little doors or unwrapping tiny gifts, children get to punch through a numbered cover to discover what’s hiding inside. Each cup holds a small surprise, making every day of December feel like a mini celebration.
The best part? You don’t need expensive craft supplies or advanced DIY skills to put this together. Most of the materials can be found at a dollar store, and you can customize the colors, treats, and decorations to suit your family’s Christmas traditions.
The finished calendar looks like a Christmas tree, with 24 numbered cups arranged on a foam board. Colorful napkins cover the cups, hiding the surprises until it’s time to punch one open. It’s a creative way to build excitement throughout the holiday season while giving kids a fun hands-on activity.
Punch Out Advent Calendar Supplies
Before getting started, gather everything you need. This project uses inexpensive materials that are easy to find at dollar stores or craft shops.

Here is your supply list:
- 20 x 30-inch foam core board: This will serve as the main backing for your Advent calendar. Choose a sturdy board that can support the cups and their contents.
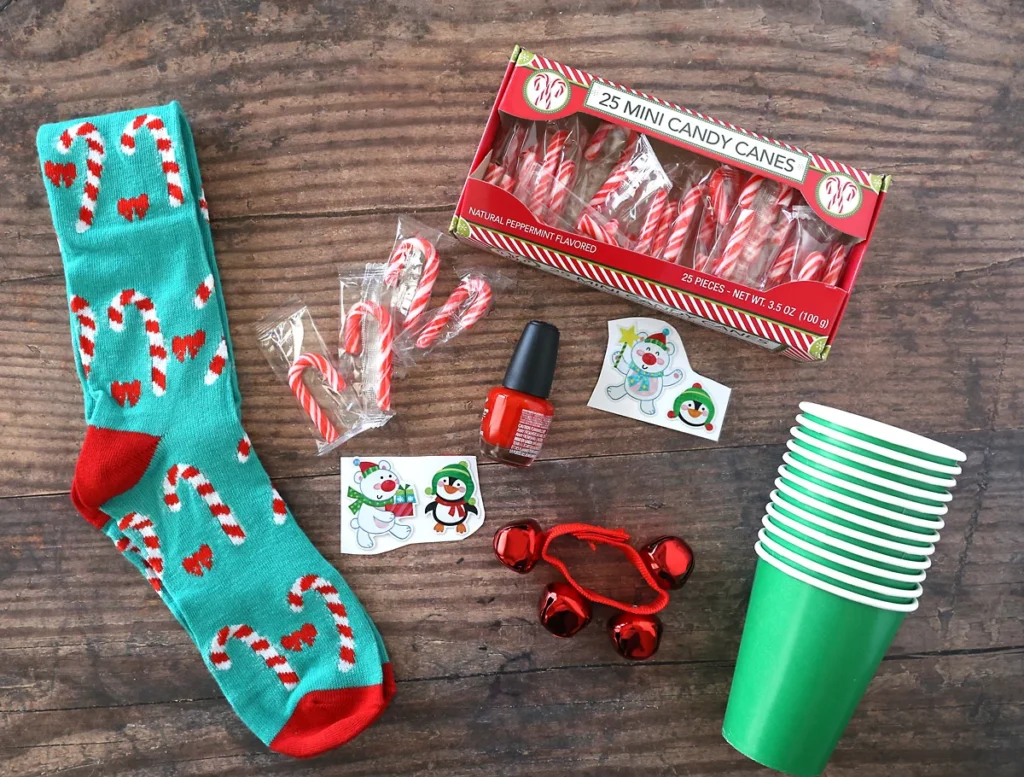
- 24 small paper cups: Green and red cups create a festive Christmas color scheme. You can also use one color if you prefer a simpler look.
- Green and red paper napkins: These will cover the openings of the cups and create the punch-through sections.
- Rubber bands: You’ll need these to secure the napkins around the tops of the cups.
- Hot glue gun: Use hot glue to attach the filled cups securely to the foam board.
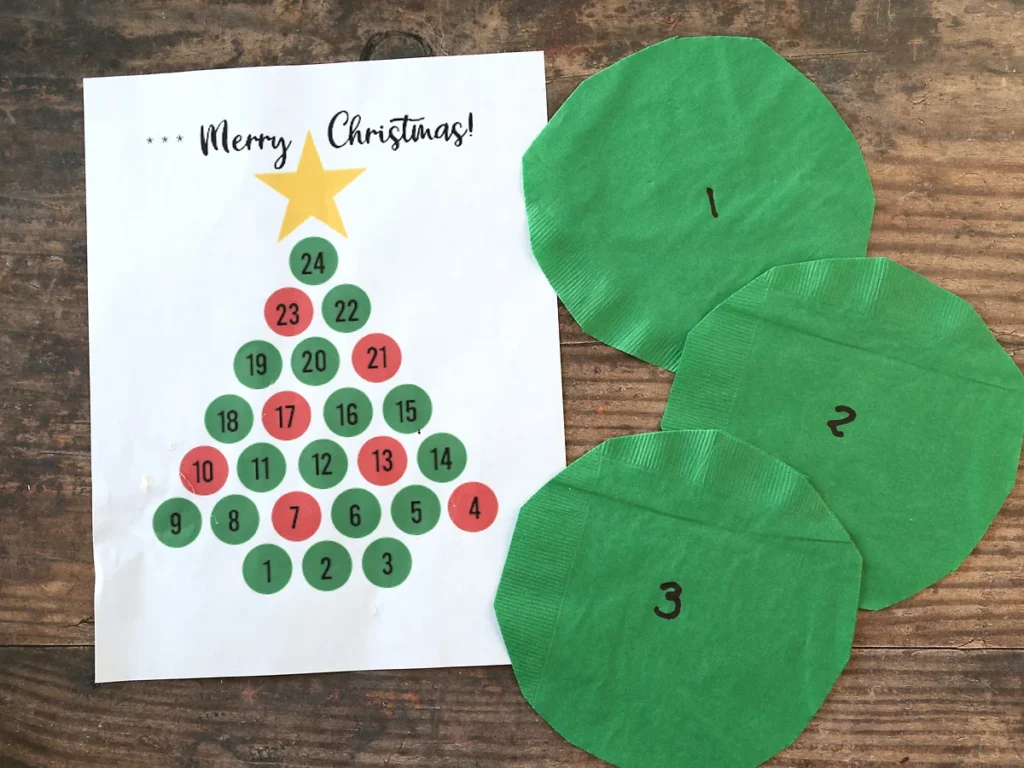
- Printable Merry Christmas signs: Print out decorative lettering to place across the top of your calendar.
- Printable Christmas tree template: This helps you arrange all 24 cups into a neat tree shape.
You’ll also need scissors, a marker, a printer, and small surprises to put inside the cups.
Ideas for filling the cups:
You don’t have to spend much money on the daily surprises. Small items and inexpensive treats work wonderfully. Consider adding:
- Individually wrapped chocolates or candies.
- Christmas stickers and temporary tattoos.
- Miniature toys or figurines.
- Small jingle bells.
- Hair accessories or colorful clips.
- Fun erasers and tiny stationery items.
- Mini nail polishes.
- Christmas-themed socks.
- Small notes with holiday activities or family challenges.
Choose lightweight items that fit comfortably inside the cups. Avoid filling them with heavy gifts because too much weight can make the foam board unstable, especially if you’re leaning it against a wall.
How to make a Punch Out Advent Calendar
Creating this Christmas countdown is easier than it looks. The process involves preparing the Christmas sign, filling the cups, covering them with numbered napkins, and attaching everything to the foam board.


Follow these steps to put your calendar together.
Step 1: Prepare the Christmas heading
Start by printing your Merry Christmas decoration. If you’re using a printable design divided across two pages, print both sheets at their original 100% size.
Trim the overlapping edge of the first sheet so the two pieces fit together neatly. Align the lettering and decorative star, then glue the pages together.
Attach the completed sign near the top of your foam core board using a glue stick or adhesive roller. Leave enough room underneath for the Christmas tree arrangement.
Step 2: Fill all 24 cups
Next, prepare the surprises for your calendar.
Divide your treats and small gifts among the 24 paper cups. You can put something different in every cup or repeat a few inexpensive favorites.
For a traditional Christmas tree appearance, use a combination of red and green cups. For example, you could use seven red cups and 17 green ones. However, an all-green design looks just as festive and requires less color coordination.
Remember to distribute the heavier items carefully. Keeping the contents lightweight will help prevent the finished calendar from tipping forward.
Step 3: Prepare the napkin covers
Take your paper napkins and cut around the edges to create roughly circular covers. There’s no need to make perfectly shaped circles because the napkins only need to extend far enough over the cup openings to stay in place.
If you’re using four-ply napkins, separate or prepare enough material to cover all 24 cups. For a design using both colors, you can prepare approximately five green napkins and two red napkins, depending on their size and how many covers you can cut from each.
Tissue paper is another option if you don’t have suitable napkins. Choose colors that coordinate with your cups for a cohesive Christmas look.
Step 4: Number the napkins
Before attaching the covers, decide how you want the numbers arranged.
Use the printable Christmas tree template as a guide for positioning the numbered cups and choosing which ones should be red or green. You can also plan your own layout as long as all 24 numbers are included.
Write one number on each napkin, counting from 1 through 24. Use a marker that shows up clearly against the paper.
It’s easier to write the numbers before attaching the napkins, so you can work on a flat surface and keep the lettering neat.
Step 5: Cover and secure the cups
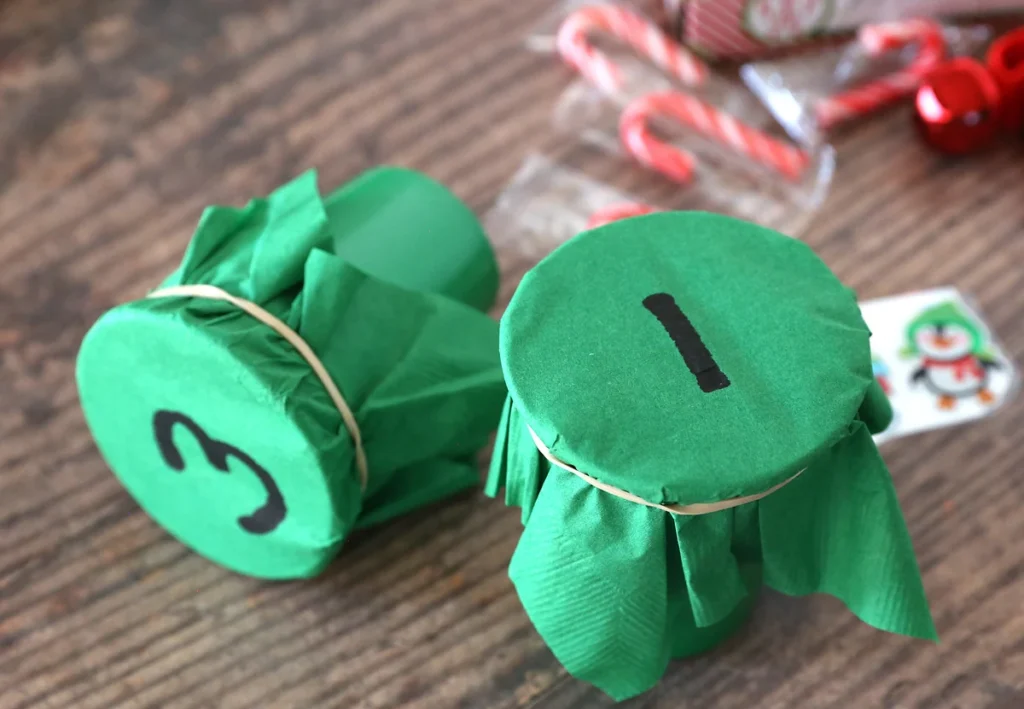
Place one prepared napkin over each filled cup. Position the number so it is easy to see from the front.
Stretch a rubber band around the top of the cup to hold the napkin securely in place. Make sure the cover is tight enough to stay attached but still easy for a child to punch through.
Repeat this process until all 24 cups are covered.
At this point, your cups should look like little numbered surprise packages, ready to become part of the Christmas tree.
Step 6: Attach the cups to the foam board
Now it’s time to assemble your Advent calendar!
Begin with cup number 24. Apply hot glue around the bottom edge of the cup and attach it to the foam board directly underneath the Christmas star.
Continue adding the remaining cups according to your printable tree template. Follow the suggested arrangement so the cups form a balanced Christmas tree shape.
Keep the cups relatively close together to make sure all 24 fit comfortably on the 20 x 30-inch board. Before gluing each one, check its position and make sure the numbers face outward.
Allow the glue to cool and set completely before moving the calendar.
Your DIY punch out Advent calendar is ready! Display it somewhere children can easily reach, preferably against a sturdy wall or on a secure surface.
Starting December 1, let your child punch through the corresponding numbered napkin each morning to reveal that day’s surprise. Continue until Christmas Eve!
For younger children, an adult should supervise the activity, especially when the calendar contains small toys, candy, or other items that could present choking hazards.
Punch Out Advent Calendar FAQs
Can I glue all the cups onto the foam core board first and then fill them?
Yes, you can attach the empty cups to the foam board before putting the surprises inside. However, filling them beforehand is generally easier.
Once the cups are positioned close together, there may not be much room to stretch rubber bands around their openings. Preparing the treats and securing the napkin covers before gluing the cups to the board makes the assembly process much more convenient.
Can I wait until after the cups are glued on the foam core to add the numbers?
Absolutely! You can write the numbers on the napkins after attaching them to the cups if that works better for your schedule.
Just keep in mind that writing on a napkin that’s already stretched over a cup can be slightly awkward. The paper may move around, making it harder to create neat numbers. Adding the numbers before attaching the covers is usually the easiest approach, but either method works.
Why are some cups green and some cups red?
The red and green combination is simply a decorative choice that gives the Advent calendar a classic Christmas tree appearance. Using two colors also makes the finished design more playful and festive.
You don’t have to use both colors, though. If you want to save time or simplify your shopping list, choose green cups and green napkins for the entire project. You can still add a colorful Christmas sign and star at the top to make the calendar stand out.